
By making their own instruments, children learn how sounds are created and gain concrete experience around the fundamentals of music , such as timbre and pitch. In addition, making homemade instruments can be a very fun experience, with which multiple benefits are obtained from this practice that it would be advisable to try. Of course, creating homemade instruments should always be a supervised and controlled activity by adults, since the use of different tools is usually necessary.
Guide to making 2 homemade musical instruments
MUSICAL PIPES
To make this musical instrument we will need to have a pipe, which must be marked and turned until the tube becomes smaller pieces. Once we have taken the necessary steps, the pipe will become an instrument with a nice and charming musical tone .
- Materials you will need : 1 copper tube of 1.5 or 2 cm. thick and about 2 meters long or 3; a ruler and a pencil; a pipe cutter (the best and cheapest cutters are bladeless pipe cutters) or a hacksaw (which should only be used by adults); wood slats; glue; strips of foam rubber or corks.

- Steps to follow . First you must measure and cut the tubes in the following lengths: 25 cm, 23, 21, 19… and so on, that is, the pieces will have to be cut proportionally smaller and smaller. Start by cutting the longest piece first so that if you make a mistake, you can reduce the sizes later and not waste the pipe . Have the children collaborate by measuring the lengths as close to what you see fit as possible and marking future cuts with a pencil. Open the pipe cutter and position it so that the blade is right on the mark. Tighten the screw and rotate the cutter around the tube several times. You can rest the tube on a workbench for easier turning. Periodically stop to tighten the shear screw and then continue rotating around the tube. Repeat until the piece of pipe falls off, or until you can break it off with gentle pressure, and continue until you have the 8 pieces that will be needed.

Arrange the pipes in order from smallest to largest and glue them from largest to smallest. You can also hold them on two wooden slats. To give the notes, you will have to cover one of the holes in each had with corks or foam rubber. The instrument can also be used as a xylophone , for which a rod will be needed to press and slide through the tubes and leave them open to the air without covering.

RAIN STICKS
Yes, there is an incredible and simple musical instrument that recreates that sweet and relaxing sound that the rain has when it falls, and we can do it in a few steps.
We can make tubes in various sizes, 2.5 cm in diameter or more than 3, as we prefer. We will need to have cardboard tubes and these must be perforated and use different types of solid elements to pour inside , such as rice or lentils. As for the measurements, although they may vary, the ideal is that the diameter is around 2.5 cm., Since the thinner it is, the slower the solids must pass through the labyrinth that we have created in the tube, which is usually done with toothpicks to avoid damage that children could suffer with more aggressive elements such as nails. As the conduit is narrower, the sound of the elements that we have chosen when passing will be more similar to the sound of the rain falling. With the wider tube you get something more like a kind of percussion instrument , as the contents pass through the tube more quickly producing a bigger sound.
The rain stick is a wonderful traditional instrument that allows the little ones to try out the different sound effects of items like lentils , popcorn, sand, macaroni or rice. Curiosity, along with the relaxing and fun sound, will make them want to participate by creating music and even dancing, which makes this activity an ideal school practice.
- Materials you will need : 1 cardboard tube per child; 1 pack of feeding sticks per child to stick into the tube in a multi-directional way; wide plastic or adhesive tape to close the holes in the tube; 1 funnel; selection of sand, rice, lentils, popcorn, etc .; Origami type paper or wrapping paper to decorate the tubes on the outside and adhesive tape with cheerful motifs or patterns to fix the external coating of the tube or rain stick depending on the number of tubes we are going to make.

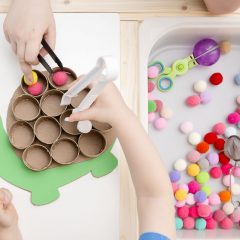
- Steps to follow. First, give each child 1 cardboard tube (for example, a roll of kitchen paper) and 1 packet of toothpicks. Ask the little ones to put the toothpicks in the tube in the position they want to create a kind of maze. Be sure to advise them to pass the toothpicks in a straight line, as the ends will stick out if inserted at an angle. If this happens, the toothpicks will simply have to be pushed a little further or cut until they fit the diameter of the tube well enough so that the toothpicks will not protrude or later pierce the outer coating that will be used for decoration. Kids will really enjoy looking through their tubes to see the toothpick maze they create!

Next, and once the children have finished nailing, ask them to seal one end of each tube, either with a stopper or with a wide plastic tape. Then let them experiment with the content choices they have made for their tube , which they should funnel into the tube to prevent it from getting lost before entering. Once done, have the children experiment with the sounds once the end that was still to be closed has been sealed. In the last step of the activity we will have to decorate the rain sticks with wrapping paper or whatever we want.
And once everything is done … let’s dance the rain dance with our fantastic musical sticks!